Hair extensions
Installation guide: How to use clip in hair extensions in 7 steps
Step 1: Preparation
Gather all the needed tools you need for the installation process. With clip-in hair, you will just need:
- Set of clip-in hair extensions
- Hairspray
- Some clips
- A mirror
- Rat tail comb
- Hairbrush
Step 2: Prep your hair
Before you start, brush your hair thoroughly to remove any knots and tangles. This will help the installation goes more smoothly.
Step 3: Divide your hair into sections
Section off your hair using the back end of your rat tail comb. You should section off your hair in a line from the middle of the ear all the way back to the middle of the cranium. The line must be kept as straight as possible, so a second mirror might be very helpful in this situation. Repeat on the opposite side after separating the aforementioned part of the hair with a clip. To keep things organized and straightforward, you can also clip the sections below aside.
Now it’s time to attach clip-in hair extensions piece by piece.
Step 4: Apply mid-sized pieces of clip-in hair
You will start with a mid-sized piece first. Center the piece but do not cover your ears. To maintain the stability of the extensions, brush through the area underneath and then tease at the root. Apply hairspray sparingly over the teased area.
To attach the first piece, hold both ends of the piece and dig in and attach the middle clip first. Once the first clip is secure, hold both ends and attach the clips at both ends. After that, resection your hair about two inches above the first clip-in piece. The first piece should be entirely hidden by a layer of hair. Make sure the hair lays as straight as possible.
Then, apply the second mid-sized clip-in piece just like how you do with the first piece.
Step 4: Attach the largest clip-in piece
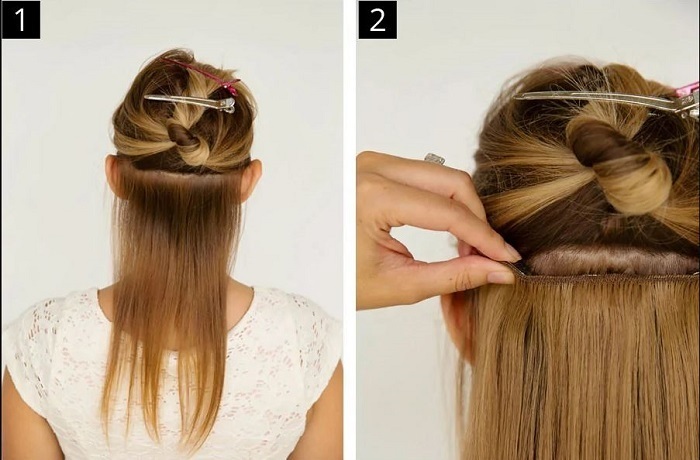
After you finish attaching two mid-sized pieces, resection your hair and proceed with the largest piece. It’s better to hold it up to find the best placement. You should center it around your crown without getting too close to the sides. Attach the clip just like how you do in step 3.
Step 5: Apply the small piece
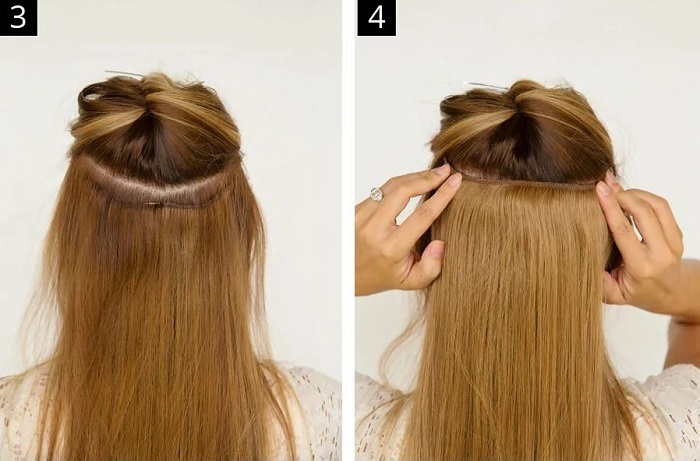
And now, let’s take the last small piece and attach it to your hair. Finding the right placement for this piece will be a bit more difficult than other pieces. You need to make sure this small piece is far enough back that it blends seamlessly with the rest of the hair. Yet, at the same time, it won’t overlap with the middle pieces too much.
Step 6: Attach a clip-in piece on the sides
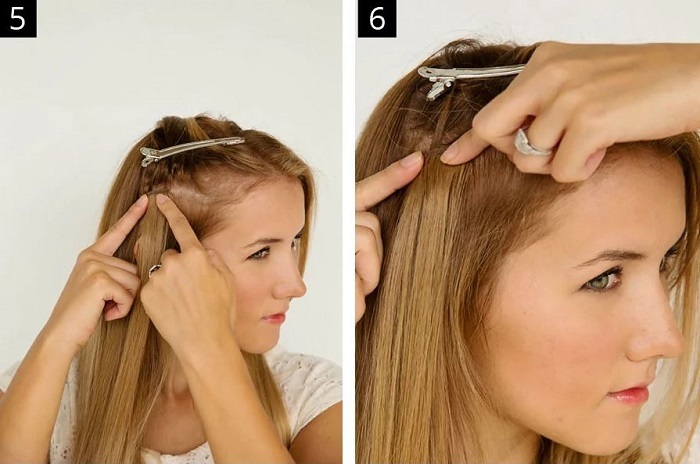
Part the hair on one side of the head starting behind the middle of the eyebrow. Make sure the hair lays as flat as possible with enough hair on top to conceal the extension piece properly.
Step 7: Style your hair
Finally, let all your hair down and do some retouching to your hair. Check how it looks in the mirror to see if there is anything that needs adjustments.
Besides, learning how to style clip in hair extensions will help you achieve a better look with the hairpieces.

And above is our guide on how to use clip in hair extensions. Don’t forget that Apohair is here to supply you with high-quality human hair clip-in extensions. Check them out now to get a stunning look!
