Hair blog
All About U-Tip Hair Extensions: A Ultimate Guide
May
U-tip hair extensions, also known as nail-tip or keratin-tip extensions, are a popular method for adding length and volume to natural hair. These extensions are applied using a heat-activated keratin adhesive that forms a secure bond with your natural hair. This guide will provide an in-depth look at U-tip hair extensions, including their benefits, application process, maintenance tips, and potential drawbacks.
What Are U-Tip Hair Extensions?
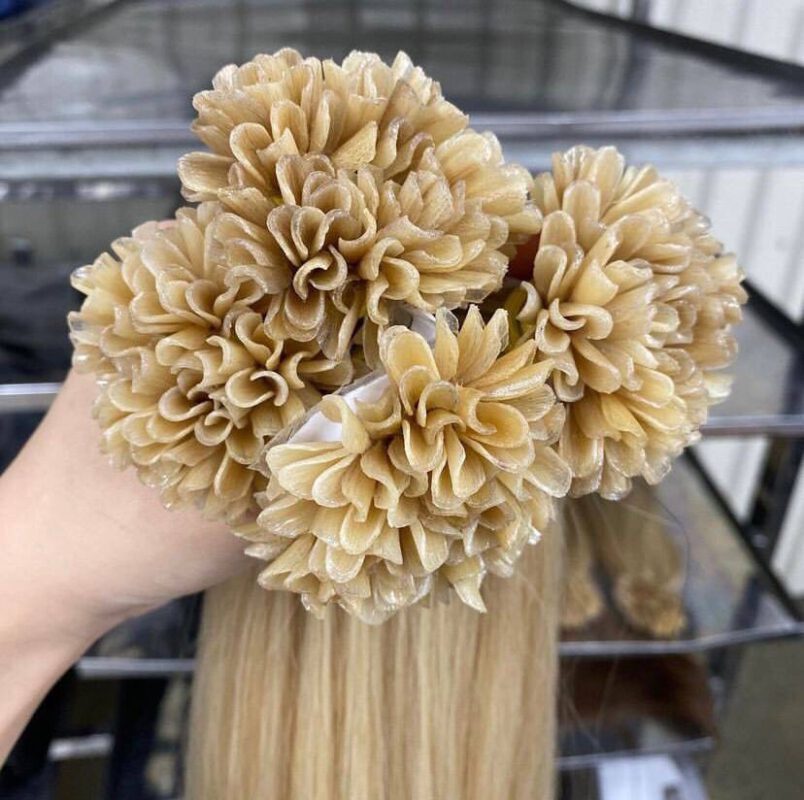
U-tip hair extensions consist of individual strands of hair with a U-shaped keratin tip at one end. The keratin tip is heated and melted, allowing it to bond with your natural hair. This method provides a strong, durable attachment that can last for several months with proper care.
Benefits of U-Tip Hair Extensions
Natural Appearance
One of the main advantages of U-tip hair extensions is their natural appearance. The keratin bond is nearly invisible and blends seamlessly with your natural hair, providing a realistic and voluminous look.
Long-Lasting
U-tip extensions are known for their durability. When properly applied and maintained, they can last up to six months, making them a cost-effective choice for those looking for a long-term hair enhancement solution.
Secure Attachment
The keratin bond used in U-tip extensions creates a secure attachment that is less likely to slip or come loose compared to other extension methods. This makes them a reliable option for individuals with active lifestyles.
Versatility in Styling
U-tip extensions can be styled just like your natural hair. You can curl, straighten, and even dye them (with professional advice) to achieve your desired look. This versatility makes U-tips a popular choice for those who enjoy changing their hairstyles frequently.
Application Process
Preparation
- Clean Hair: Start with clean, dry hair to ensure the keratin bonds adhere properly.
- Sectioning: Divide your hair into small sections to make the application process easier and more precise.
Applying U-Tip Extensions
- Positioning: Place a U-tip extension near the root of a small section of natural hair.
- Heating: Use a specialized heat tool to melt the keratin tip, allowing it to bond with your natural hair.
- Sealing: Roll the melted keratin between your fingers to create a secure bond.
- Repeating: Continue this process throughout the desired area until all extensions are applied.
Maintenance Tips
Daily Care
- Brushing: Brush your hair gently daily to prevent tangling. Use a brush specifically designed for hair extensions to avoid damaging the bonds or your natural hair.
- Washing: Wash your hair with sulfate-free shampoos and conditioners to maintain the integrity of the keratin bonds.
- Avoiding Heat: Limit the use of heat styling tools directly on the bonds to prevent weakening the keratin. Use a heat protectant spray when using heat tools on the hair itself.
Regular Maintenance
- Check-Ups: Schedule regular appointments with your stylist to check the condition of the bonds and make any necessary adjustments.
- Reapplication: After several months, the extensions may need to be removed and re-applied to maintain a natural look and avoid damage to your natural hair.
Potential Drawbacks of U-Tip Hair Extensions
Application Time
The application process for U-tip extensions can be time-consuming, often taking several hours depending on the number of extensions being applied. This requires a significant time commitment, especially for the initial installation.
Heat Damage
While the keratin bonds are generally safe, the heat required to apply them can potentially cause damage to your natural hair if not done correctly. It is crucial to have them applied by a professional to minimize the risk of heat damage.
Regular Maintenance Required
U-tip extensions require regular maintenance to keep them secure and looking their best. This includes periodic check-ups to ensure the bonds remain intact and the extensions are not causing any damage to your natural hair.
Cost
High-quality U-tip extensions, particularly those made from human hair, can be expensive. Additionally, the cost of professional installation and maintenance should be considered when deciding if U-tips are the right choice for you.
Minimizing Potential Damage
Choose a Skilled Professional
The skill of the stylist applying your U-tip extensions is crucial in minimizing damage. Choose a professional with experience and expertise in installing U-tip extensions to ensure a safe and secure application.
Proper Aftercare
Proper aftercare is essential for maintaining the health of both your natural hair and the extensions. Use sulfate-free shampoos and conditioners, avoid excessive heat styling, and brush your hair gently to prevent tangling and breakage.
Regular Maintenance
Regular maintenance appointments are necessary to keep the extensions secure and prevent damage. Be sure to schedule regular check-ups with your stylist to re-tighten the bonds and address any issues that may arise.
Avoid Overloading
Avoid overloading your natural hair with too many extensions. Excessive weight can cause strain and lead to breakage. Consult with your stylist to determine the appropriate amount of extensions for your hair type and condition.
Final Thoughts
U-tip hair extensions offer a versatile and natural-looking solution for adding length and volume to your hair. By understanding the benefits, application process, and maintenance requirements, you can enjoy beautiful, voluminous hair with minimal risk to your natural hair health. Investing in high-quality extensions and following proper care instructions will ensure that your U-tip extensions remain a valuable addition to your beauty routine.
Whether you’re new to hair extensions or looking to switch to a different method, U-tip hair extensions provide a flexible and durable option that can help you achieve your desired look. Embrace the transformation and enjoy the confidence that comes with having gorgeous, full hair.